Select Question under Campaigns from the left hand side panel and click on Create Question Campaign.
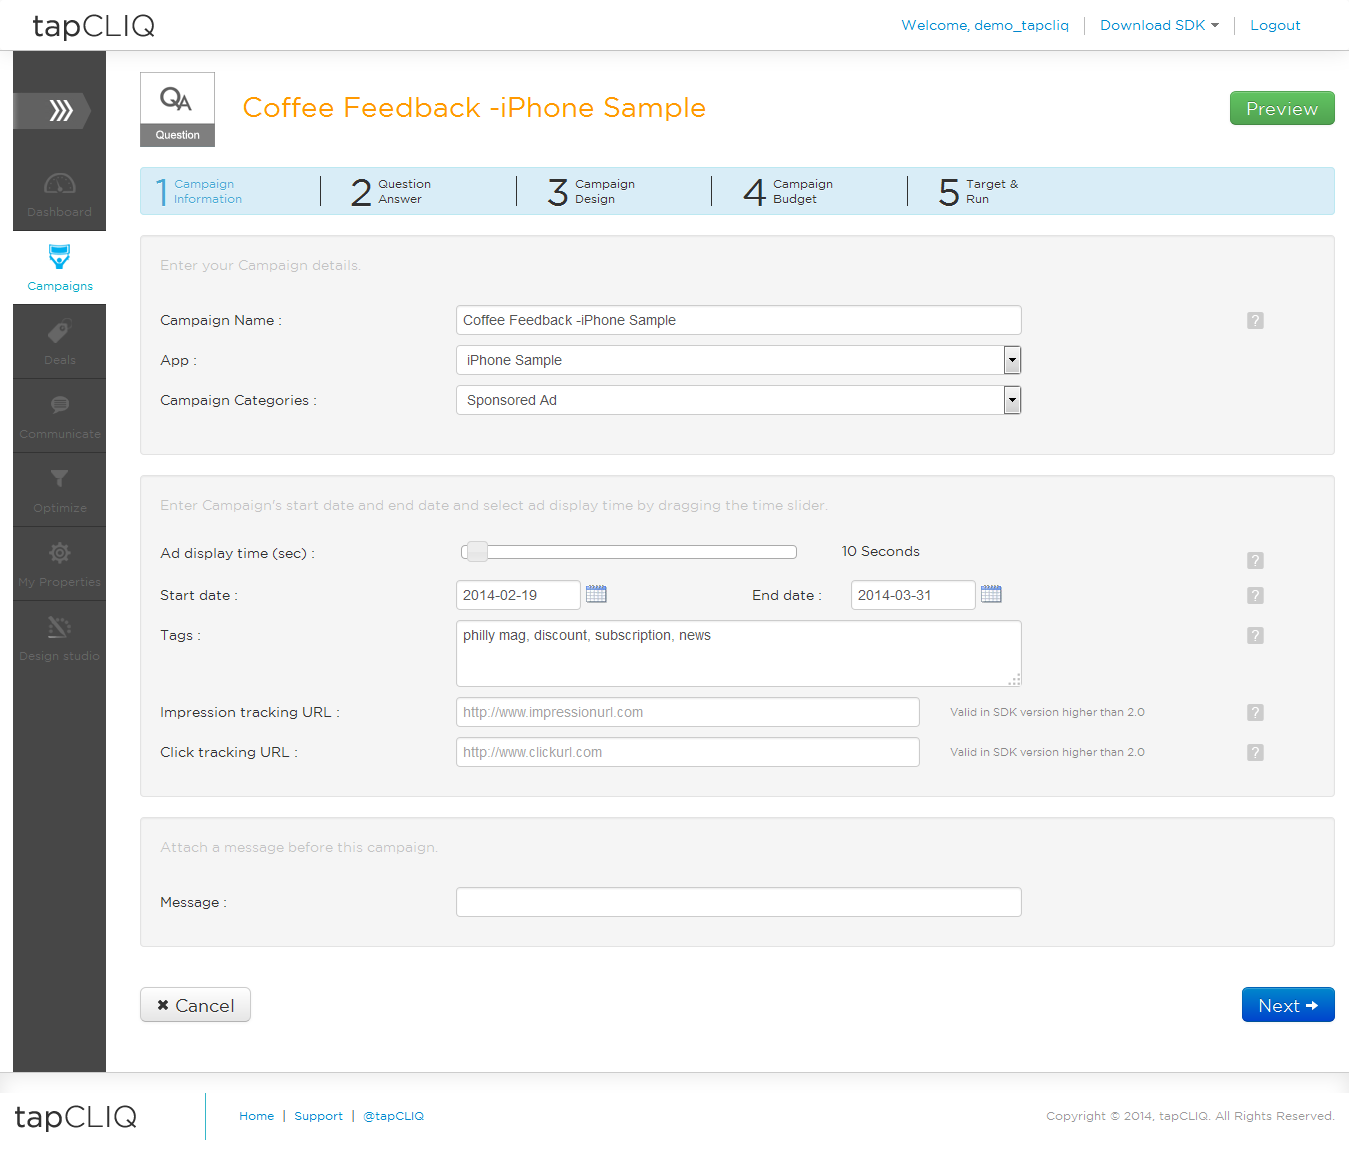
Enter campaign Information & attach message like
Campaign Name : Campaign name for your reference.
App/Brand : If you are an app developer and wish to run a campaign in one of your apps (with our SDK), select application in which you want to run this campaign. Whereas if you are an advertiser, select a brand for which you are creating this campaign.
Ad display time : Select the duration (in seconds) for which to display each question in your campaign
Start & End date : DateSelect start and end dates for your campaign – Your campaign will run during those days
Campaign tags : tags pertaining to your campaign e.g., if you have a women's clothing campaign, you can specify "clothing", "shopping", "Feedback", "Rating" etc.
Impression & Click tracking URL : If you are using a 3rd party campaign tracking mechanism you can specify their impression & click tracking URLs.
Message : This allows you to specify a message before your campaign (Optional). Ideally, message can be used to give some information prior to the campaign OR entice user to respond to your following campaign.
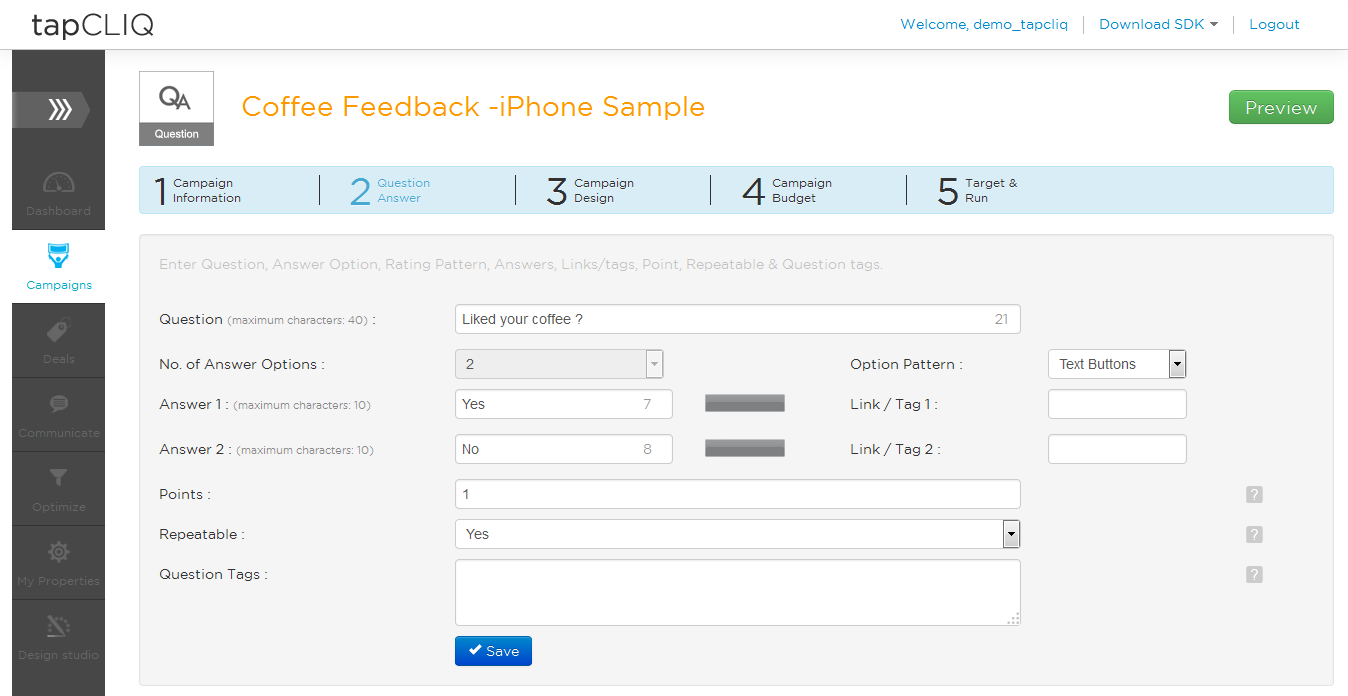
Enter one or more questions with relevant options
For each question you can choose between i) Text based options (rectangular buttons with option text) ii) Stars and iii) Tomatoes (Note: Stars & Tomatoes are generally used for ratings and are available only for iOS / Android apps)
Along with capturing user's response if you wish to redirect the user to a relevant web link in an in-app web view, you can link each or any answer option to a valid web URL (by specifying it in corresponding link/tag). This is optional
Question Tags : tags pertaining to the current question (optional). Helps in sending question to right users.
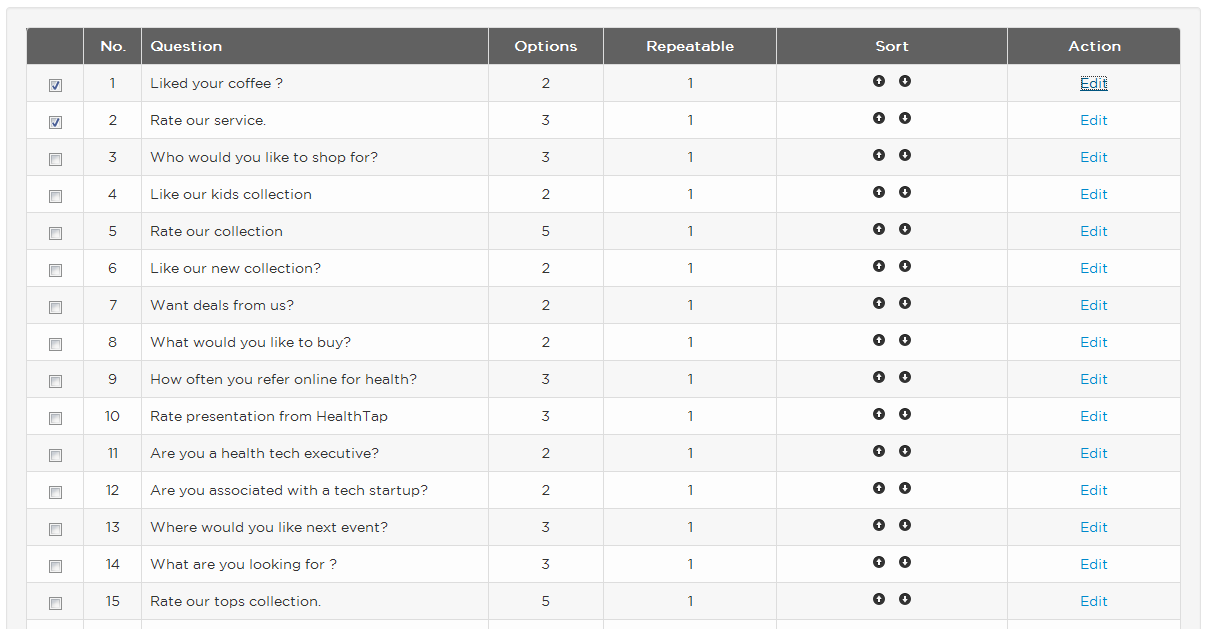
Select questions from the list that you wish to include in the campaign.
Campaign Design
Ad type (size) : Select Ad type (size) in which this question should be displayed
Campaign logo (optional) : If selected it will appear as 40 x 40 pixel on left hand side of your campaign.
Theme : Choose tapCLIQ’s default theme or create your own – you can specify i) Question Color, ii) Answer Color and iii) The background color or image.
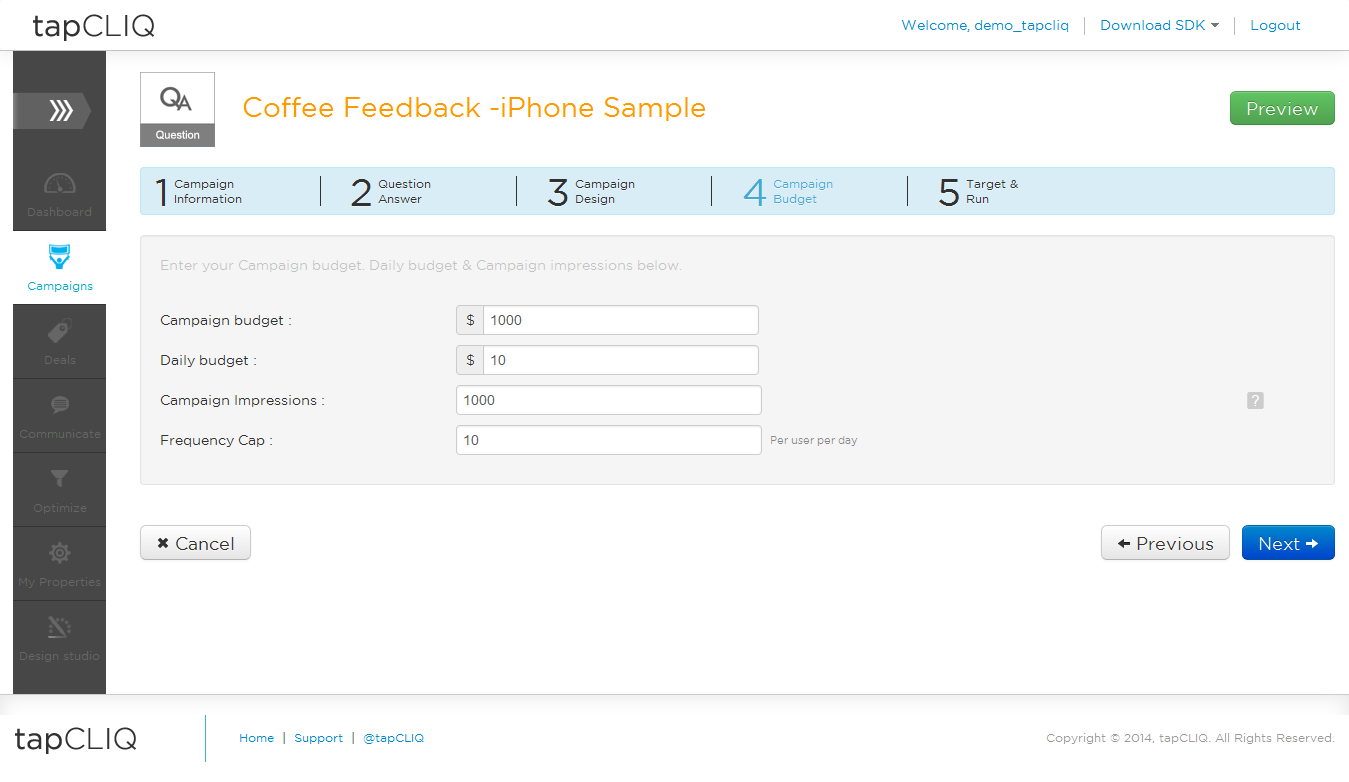
Campaign Budget - Specify Total Budget, Daily Budget and desired number of total impressions. This helps in controlling your frequency of your campaign's distribution.
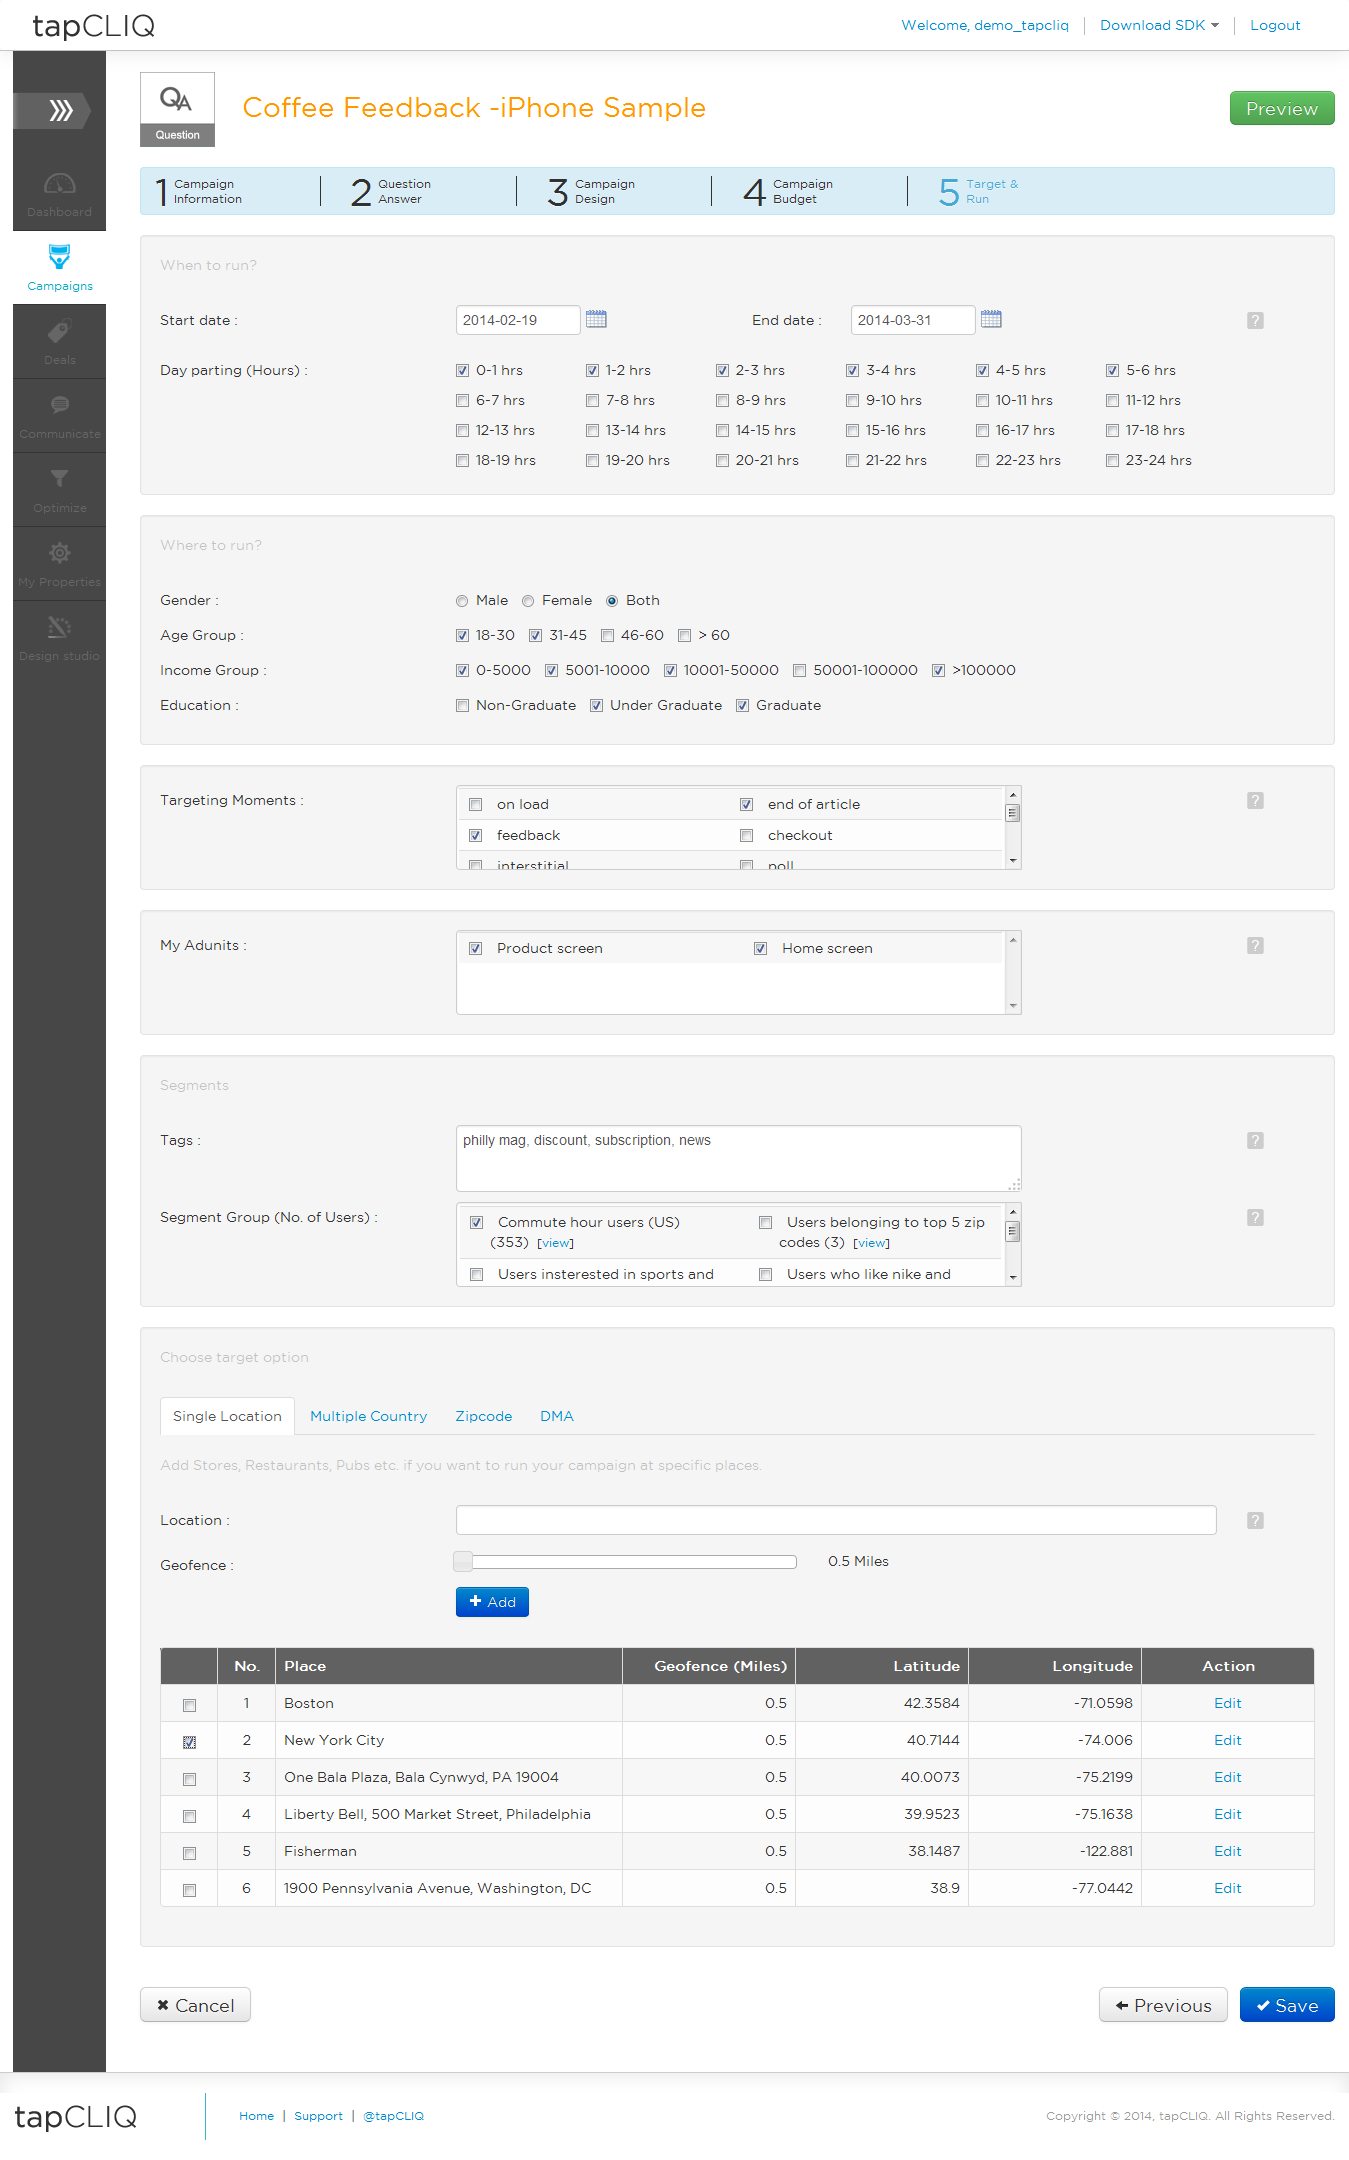
Campaign Targeting – Set target audience of your campaign
Start and End dates : Dates between which you want to run your campaign
Day Parting (hours): Hours during the day you would prefer to run this campaign
Tags : Along with campaign tags added in step 1 you can specify various targeting tags for e.g., if you are targeting women who like tops, you can specify tags like "women", "tops" etc.
Device : Select the type of device on which you want to run your campaign.
NOTE: If this campaign is for a particular app, application's device capability supersedes device targeting.
Platform : Choose the platform on which you wish to run your campaign ( iOS, Android, Web ). This option is only available to advertisers.
Apps : Choose particular apps in which to run your campaign (Available only to advertisers of enterprise ad network)
Ad / Engagement Units: Units available for targeting will depend on app / website you have selected in above step.
Segment Groups : Use our smart analytics to create and target specific group of users (e.g., Users belonging to top 5 locations OR users who have given a certain answer to certain questions OR users with specific interest tags)
Location : Target by Country, by Zip codes, by DMAs and by specific locations with Geo Fence.