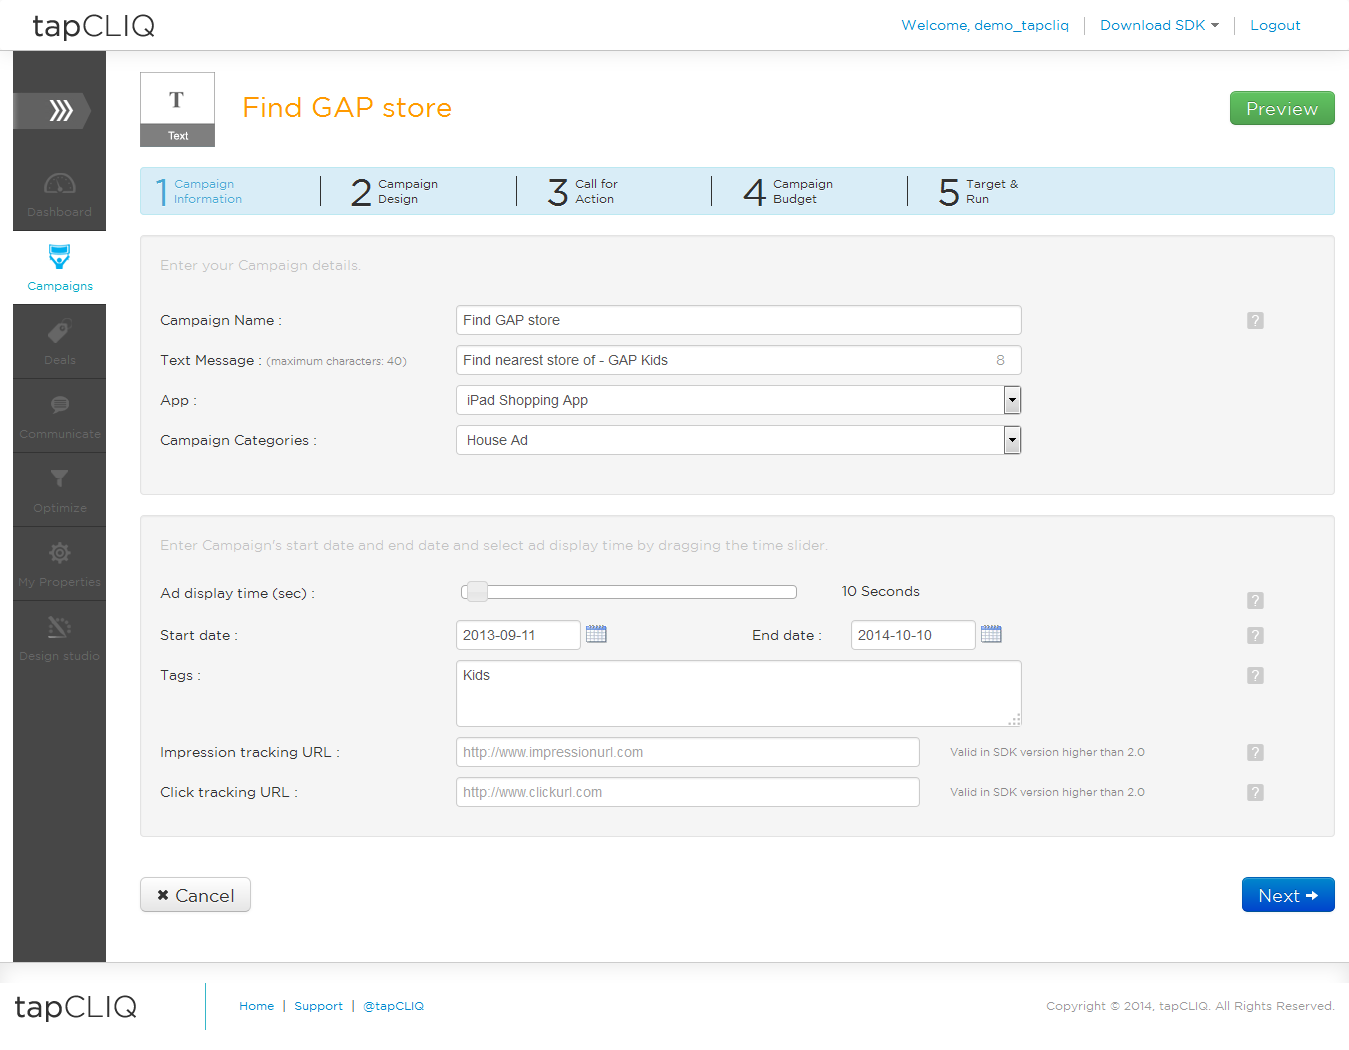
Select Text under Campaigns from the left hand side panel and click on Create Text Campaign.
Enter campaign Information like
Campaign Name : Campaign name for your reference.
App/Brand : If you are an app developer and wish to run a campaign in one of your apps (with our SDK), select application in which you want to run this campaign. Whereas if you are an advertiser, select a brand for which you are creating this campaign.
Ad display time : Select the duration (in seconds) for which to display this campaign
Start & End date : DateSelect start and end dates for your campaign – Your campaign will run during those days
Campaign tags : tags pertaining to your campaign e.g., if you have a women's clothing campaign, you can specify "clothing", "shopping", "Feedback", "Rating" etc.
Impression & Click tracking URL : If you are using a 3rd party campaign tracking mechanism you can specify their impression & click tracking URLs.
Campaign Design
Ad type (size) : Select Ad type (size) in which this text campaign should be displayed
Campaign logo (optional) : Select a campaign logo (optional). If selected it will appear as 40 x 40 pixel on left hand side of your campaign.
Theme : Choose tapCLIQ's default theme or create your own – you can specify i) Question Color, ii) Answer Color and iii) The background color or image.
Call for Action - Select appropriate call for action. It determines what is to be displayed when user clicks on the image banner.
NOTE: All call for actions except call & app store are in-app (i.e., user will not be taken out of the app)
Available options are :
A Web Link - used to display a web page
Call - Allows user to make a call
Map - Pops up a map with location
Download App - Links to an app in the app store
Deals - Displays deals associated with the ad campaign
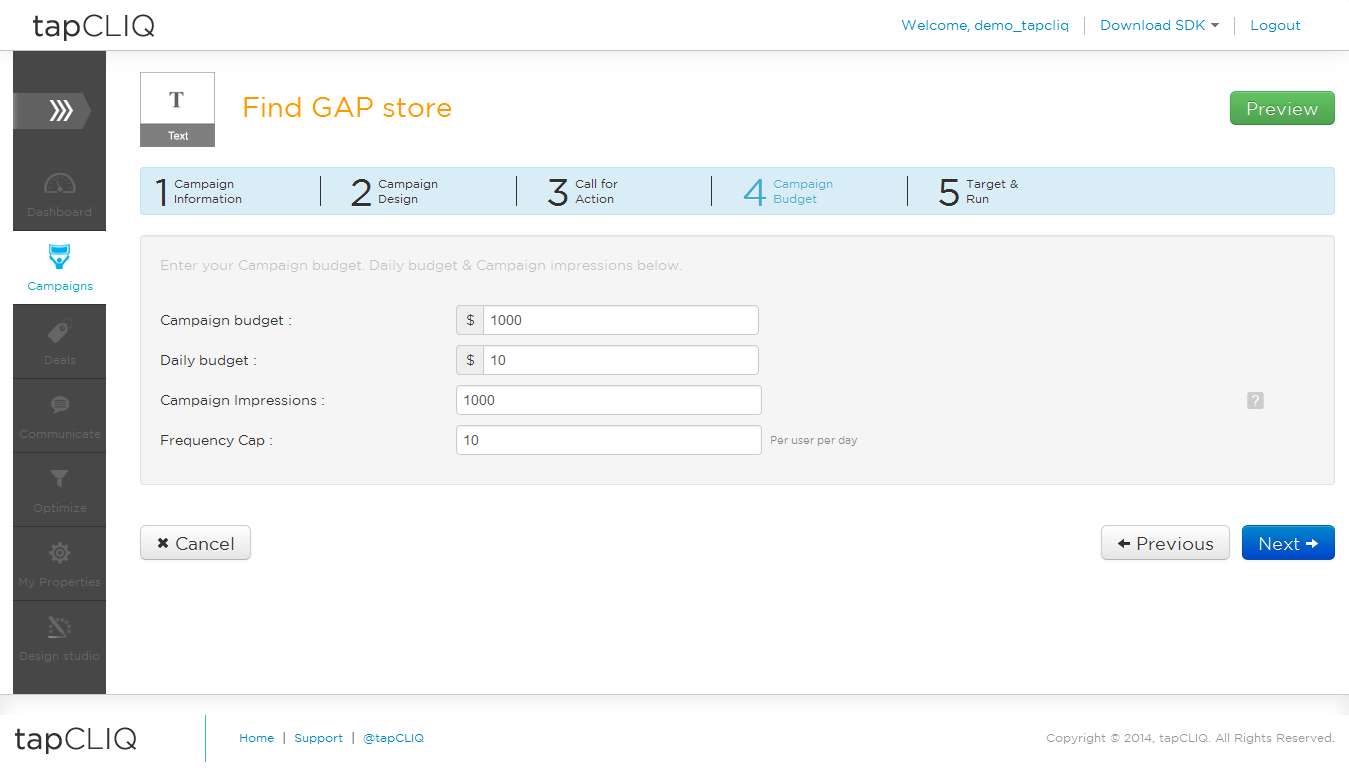
Campaign Budget and frequency : Specify Total Budget, Daily Budget and desired number of total impressions. This helps in controlling frequency of your campaign distribution.
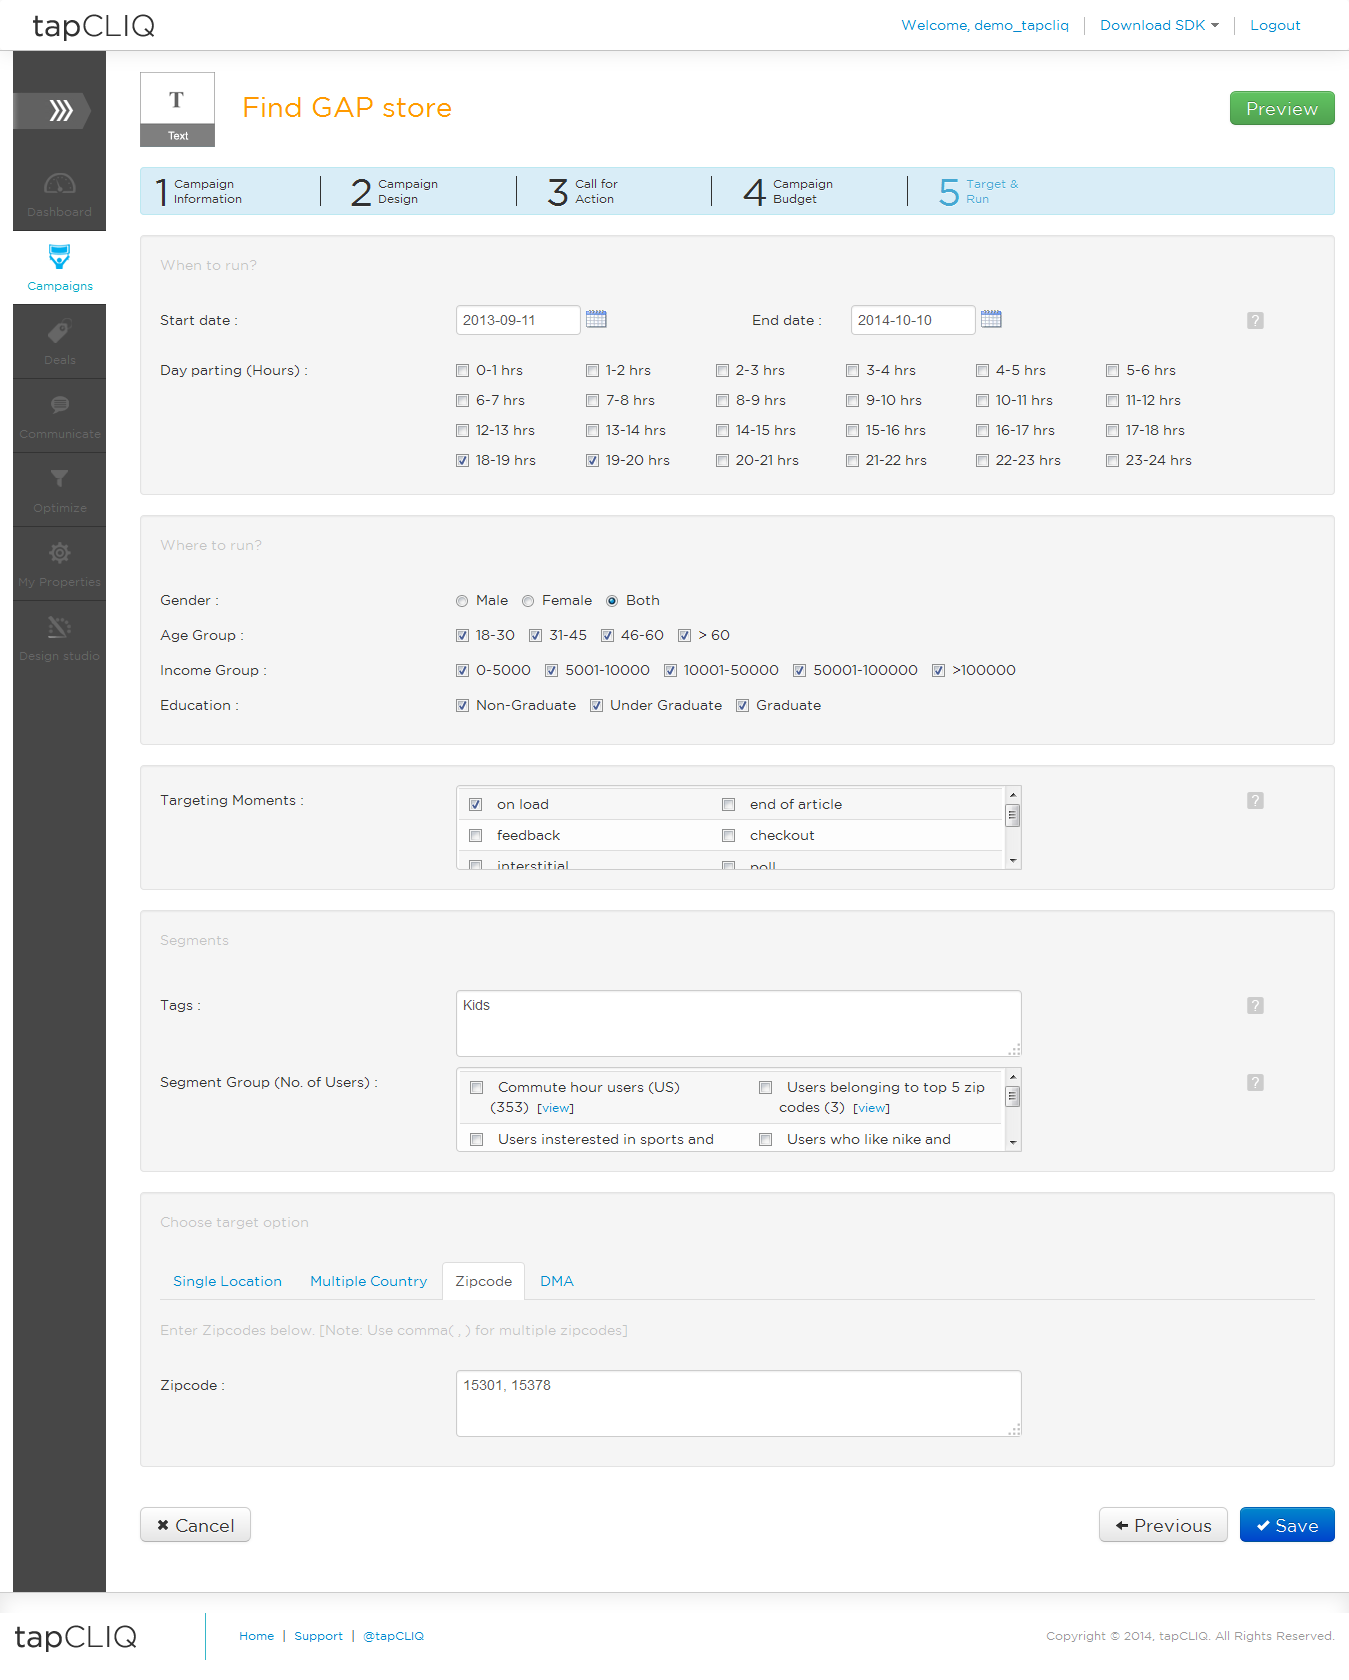
Campaign Targeting – Set target audience of your campaign
Start and End dates : Dates between which you want to run your campaign
Day Parting (hours): Hours during the day you would prefer to run this campaign
Tags : Along with campaign tags added in step 1 you can specify various targeting tags for e.g., if you are targeting women who like tops, you can specify tags like "women", "tops" etc.
Device : Select the type of device on which you want to run your campaign.
NOTE: If this campaign is for a particular app, application's device capability supersedes device targeting.
Platform : Choose the platform on which you wish to run your campaign ( iOS, Android, Web ). This option is only available to advertisers.
Apps : Choose particular apps in which to run your campaign (Available only to advertisers of enterprise ad network)
Ad / Engagement Units: Units available for targeting will depend on app / website you have selected in above step.
Segment Groups : Use our smart analytics to create and target specific group of users (e.g., Users belonging to top 5 locations OR users who have given a certain answer to certain questions OR users with specific interest tags)
Location : Target by Country, by Zip codes, by DMAs and by specific locations with Geo Fence.