To create Rich Messages


  1. Select Banner under Campaigns from the left hand side panel and click on Create Banner Campaign.
  2. Enter campaign Information & attach message like
    • Campaign Name : Campaign name for your reference.
    • App/Brand : If you are an app developer and wish to run a campaign in one of your apps (with our SDK), select application in which you want to run this campaign. Whereas if you are an advertiser, select a brand for which you are creating this campaign.
    • Ad display time : Select the duration (in seconds) for which to display this campaign
    • Start & End date : DateSelect start and end dates for your campaign – Your campaign will run during those days
    • Campaign tags : tags pertaining to your campaign e.g., if you have a women's clothing campaign, you can specify "clothing", "shopping", "Feedback", "Rating" etc.
    • Impression & Click tracking URL : If you are using a 3rd party campaign tracking mechanism you can specify their impression & click tracking URLs.
    • Message : This allows you to specify a message before your campaign (Optional). Ideally, message can be used to give some information prior to the campaign OR entice user to respond to your following campaign.


  3. Upload Image Banners
    • Select type for your image banner campaign : available options are i) Rectangle (320 x 50) (for phone & tablet), ii) Square (320 x 240) (for tablet only), iii) Full Screen (for both phone & tablet), iv) Full Width (768 x 90, 1024 x90) (for tablet only) and v) Custom (704 x 90) (for tablet only – ideally used in a split view)
    • Based on your selection in (a) upload image banners of mentioned sizes.

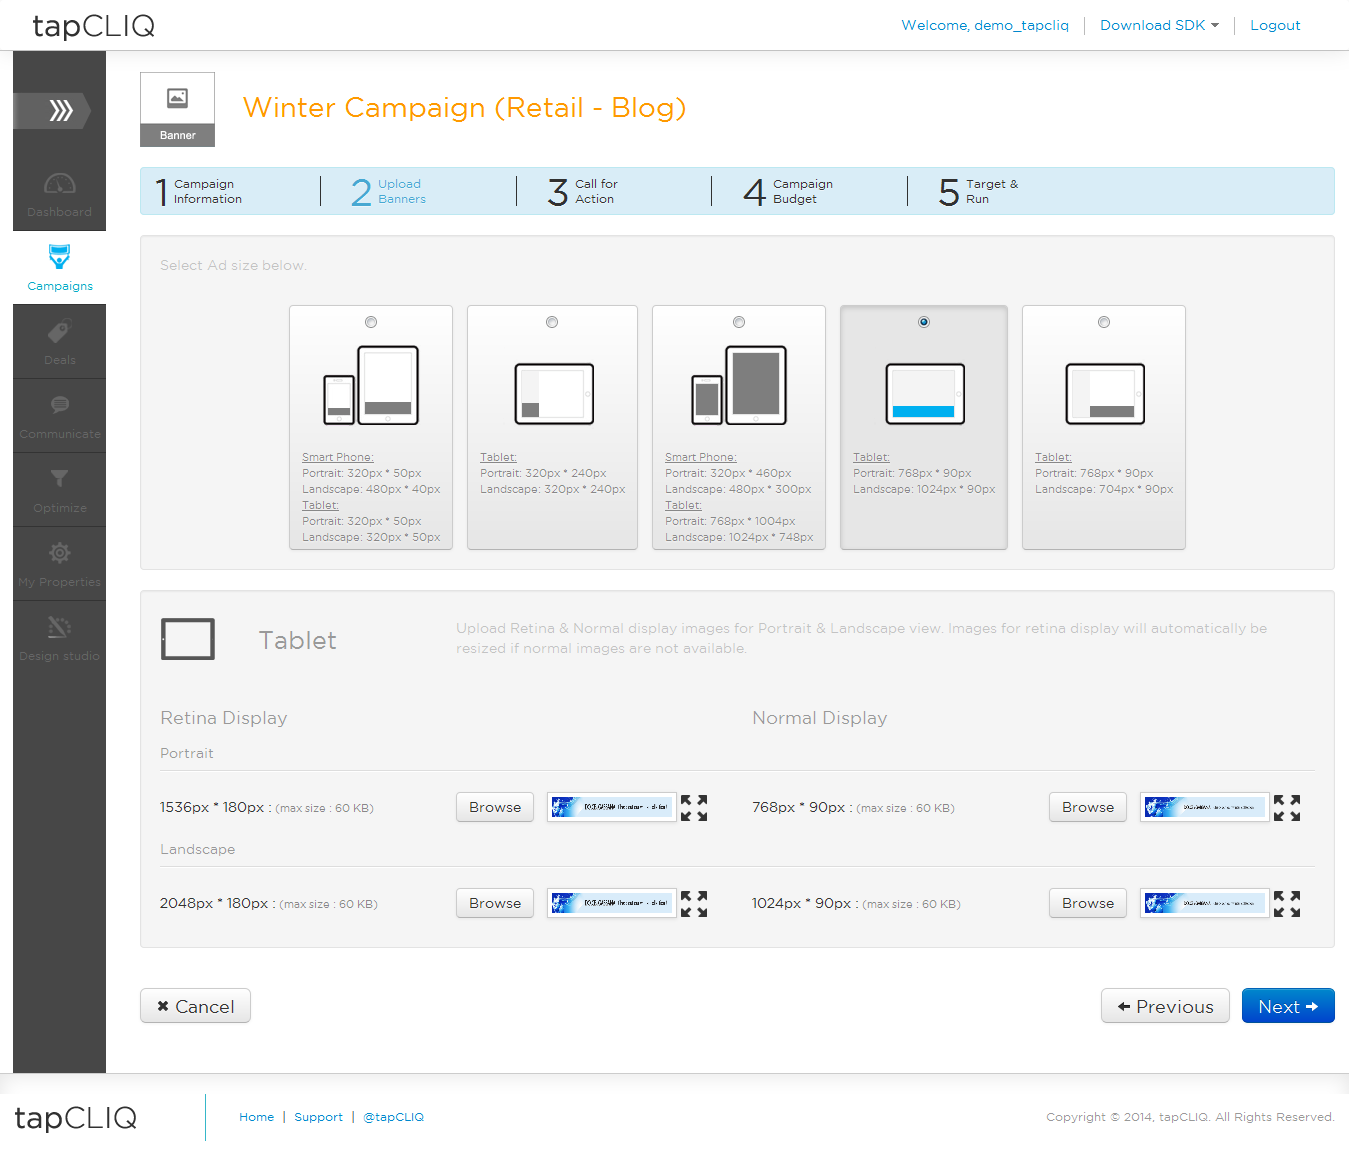
      NOTE: It is mandatory to upload images for normal display.


  4. Call for Action : Select appropriate call for action. It determines what is to be displayed when user clicks on the image banner.

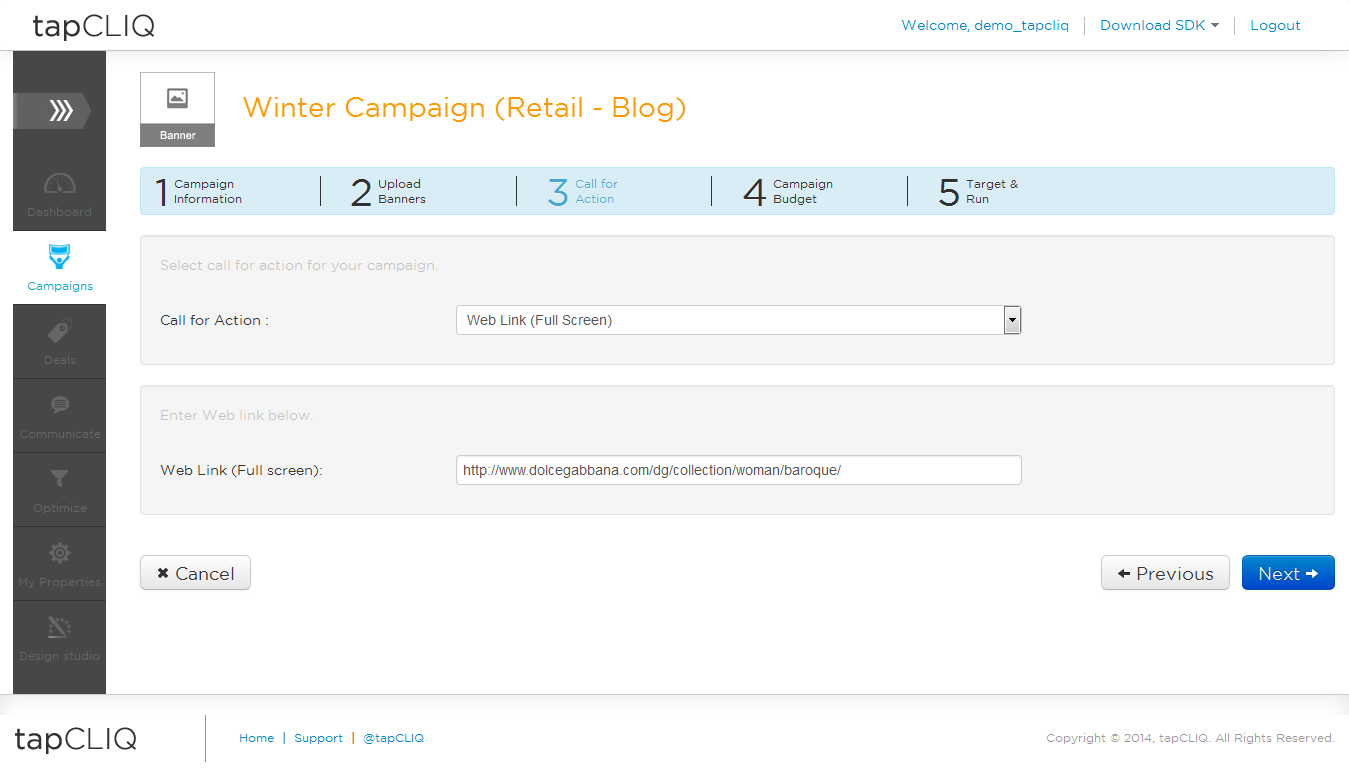
    NOTE: All call for actions except call & app store are in-app (i.e., user will not be taken out of the app)


  5. Available options are :
    • A Web Link : used to display a web page
    • Call : Allows user to make a call
    • Map : Pops up a map with location
    • Download App : Links to an app in the app store
    • Deals : Displays deals associated with the ad campaign


  6. Campaign Budget and frequency : Specify Total Budget, Daily Budget and desired number of total impressions. This helps in controlling frequency of your campaign distribution.


  7. Campaign Targeting – Set target audience of your campaign
    • Start and End dates : Dates between which you want to run your campaign
    • Day Parting (hours): Hours during the day you would prefer to run this campaign
    • Tags : Along with campaign tags added in step 1 you can specify various targeting tags for e.g., if you are targeting women who like tops, you can specify tags like "women", "tops" etc.
    • Device : Select the type of device on which you want to run your campaign.

      NOTE: If this campaign is for a particular app, application's device capability supersedes device targeting.

    • Platform : Choose the platform on which you wish to run your campaign ( iOS, Android, Web ). This option is only available to advertisers.
    • Apps : Choose particular apps in which to run your campaign (Available only to advertisers of enterprise ad network)
    • Ad / Engagement Units: Units available for targeting will depend on app / website you have selected in above step.
    • Segment Groups : Use our smart analytics to create and target specific group of users (e.g., Users belonging to top 5 locations OR users who have given a certain answer to certain questions OR users with specific interest tags)
    • Location : Target by Country, by Zip codes, by DMAs and by specific locations with Geo Fence.


Back to Top